 Pin It
 Every so often, a recipe has a way of turning my whole kitchen into a celebratory scene, and these Easy Graduation Cheesecake Bites have done that more than once. The sound of laughter drifting in from the living room and the crackle of the oven preheating set the stage, while the sweet scent of cream cheese and vanilla fills the air. I didn't plan on making cheesecake bites a party tradition, but after a last-minute baking session for a cousin's graduation, it just stuck. There are days when big desserts feel like too much—these bites are the perfect answer, inviting people to grab one (or two) without thinking twice. Now, a tray of these mini cheesecakes signals not just dessert, but a moment to gather and celebrate any milestone.
One particularly rainy afternoon, I rushed these cheesecake bites to the dining table just as my niece announced her college acceptance. Everyone reached for them between squeals of excitement, each bite somehow sweeter in the glow of good news and shared anticipation.
Ingredients
- Graham cracker crumbs: These give you that classic, golden base—I've found pulsing them in a food processor makes an irresistibly fine, even crust.
- Granulated sugar: Essential for both texture and balance, a little in the crust and filling brings gentle sweetness without being cloying.
- Unsalted butter: Melted butter helps bind the crust, and I've learned to let it cool slightly so the base stays crisp, not greasy.
- Cream cheese: The star of any cheesecake, softened cream cheese melts into a silky filling that never cracks if you mix gently.
- Large eggs: Room temperature eggs blend smoothly and prevent over-beating, which can create pesky air bubbles.
- Pure vanilla extract: Even just a teaspoon lifts the flavor, so don't skip or skimp.
- Sour cream: This tiny addition brings tang and a soft, creamy texture—trust me, it's worth it.
- Salt: Just a pinch, but it magically enhances and rounds out the flavors.
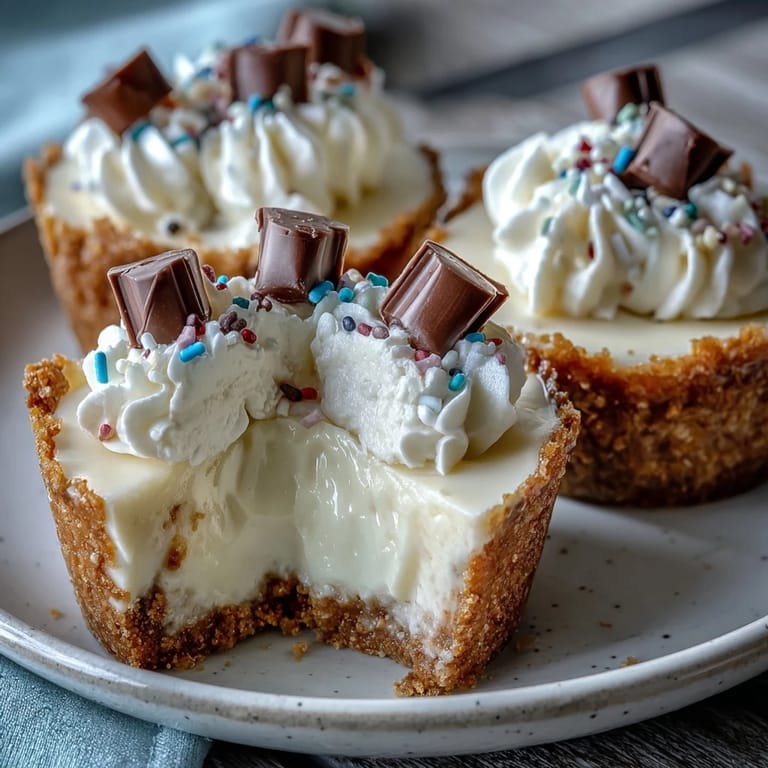
- Whipped cream (optional): For topping, it adds a lightness that pairs perfectly with the dense cake below; pipe it on just before serving for the prettiest results.
- Festive sprinkles or mini chocolate graduation caps: Bring as much color or theme as you wish, and let the kids help decorate for extra fun.
- Fresh berries (optional): Their tartness cuts through the richness if you prefer a fruity finish.
Tired of Takeout? 🥡
Get 10 meals you can make faster than delivery arrives. Seriously.
One email. No spam. Unsubscribe anytime.
Instructions
- Ready the oven and liners:
- Set your oven to 325F (160C) and line a 24-cup mini muffin pan with paper liners, enjoying the gentle crinkle as each liner nestles into its spot.
- Make the crust:
- In a bowl, stir together graham crumbs, sugar, and melted butter until every crumb looks slightly shiny, then pack a tablespoon into each liner and press down firmly—a shot glass works wonders for this.
- Bake the crusts:
- Pop them in for 5 minutes, then let the smell of toasted graham crackers fill your kitchen as they cool for a beat.
- Prepare the creamy filling:
- With an electric mixer, beat the cream cheese until dreamy and smooth, then blend in sugar. Crack in eggs one by one, gently mixing, then swirl in vanilla, sour cream, and a pinch of salt just until combined for the silkiest batter.
- Fill and bake:
- Spoon the batter over each crust almost to the top, and bake for another 13–15 minutes until mostly set but with a subtle jiggle that promises creaminess inside.
- Cool and chill:
- Let the cakes cool in the pan for 10 minutes, then transfer to a wire rack. Once room temperature, they need at least a half hour in the fridge to become truly luscious.
- Decorate and serve:
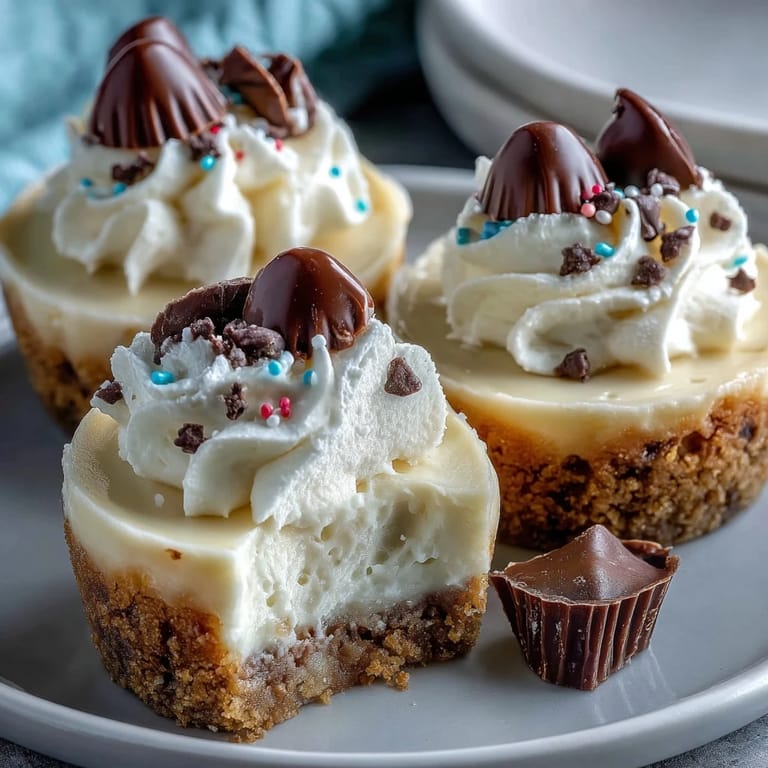
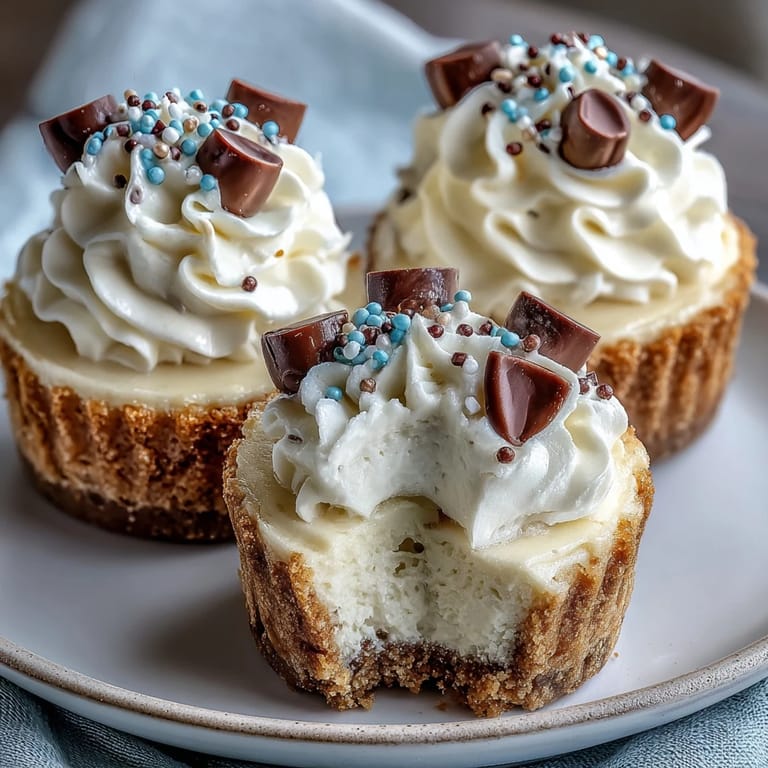
- Top each bite with whipped cream and your favorite festive toppings, savoring the communal moment when everyone gathers around to admire and taste the display.
 Pin It
The first time I made these, my hands shook slightly as I balanced a tray through the backyard gate, only to have my brother swipe one before I'd even set it down. Seeing his eyes widen at the first bite, I realized I'd stumbled onto something special that day.
How to Make Your Grad Caps Stand Out
Turning chocolate squares and licorice strings into mini graduation caps became a fun activity with my youngest nephew. We experimented, laughed when some toppers slid off, and discovered a dab of whipped cream was the perfect edible glue—they were quirky but adorable in the end.
Make-Ahead and Party Planning
If I learned anything juggling dessert and school-night schedules, it's that these cheesecake bites actually improve when made a day in advance. Just wait to add the toppings until right before serving, so your celebratory designs and whipped cream stay crisp and eye-catching.
Personalization and Flavor Swaps
Playing with the base and toppings keeps things fresh, whether you swap in chocolate cookie crumbs or swap half the cream cheese for mascarpone. Adding a little lemon zest to the filling was a happy accident during one late-night prep session and it's stuck in my rotation ever since.
- Let kids or grads pick their favorite sprinkle colors.
- Crumbled cookies or crushed freeze-dried berries work as a quick topping.
- Don't forget to taste test at least one before serving—call it 'quality control'.
 Pin It
 May every bite bring giggles or cheers at your next celebration. These minis made milestone gatherings just a little bit sweeter in my kitchen—here's hoping they do the same in yours.
Recipe Questions & Answers
- → How do I prevent cracks in the filling?
Beat the cream cheese until very smooth and avoid overmixing after adding eggs. Bake until centers just set — a slight jiggle is fine — and cool gradually to reduce cracking.
- → Can I make these ahead of time?
Yes. Make up to one day ahead and keep chilled. Add whipped cream and delicate decorations just before serving to preserve texture and appearance.
- → What can I use instead of graham cracker crumbs?
Swap graham crumbs for chocolate cookie crumbs or crushed shortbread for a different flavor profile. Adjust sugar in the crust if the cookies are already sweet.
- → How should I store leftover bites?
Store in an airtight container in the refrigerator for up to 3 days. Freeze unadorned bites for up to 1 month; thaw in the fridge and add toppings before serving.
- → Can I make a gluten-free version?
Use certified gluten-free cookie crumbs for the crust and verify other ingredient labels. The filling is naturally gluten-free if no cross-contaminated ingredients are used.
- → Any tips for decorating for a graduation theme?
Use mini chocolate squares and licorice string to craft tiny mortarboards, or swap sprinkles for school-color sugar for a festive finish. Pipe whipped cream with a star tip for neat presentation.