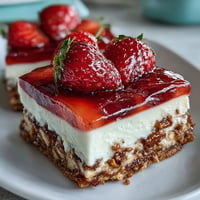
 Pin It
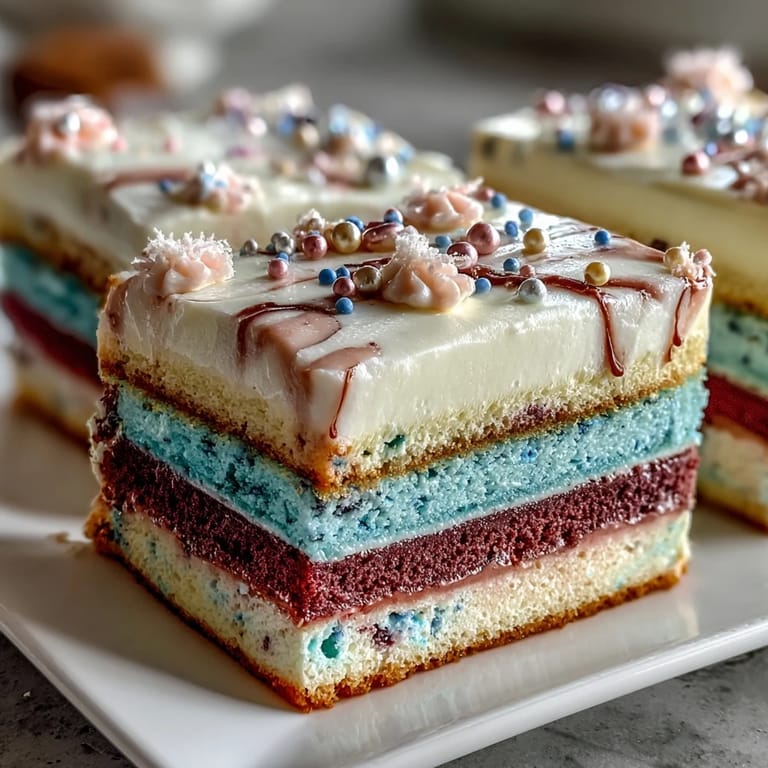
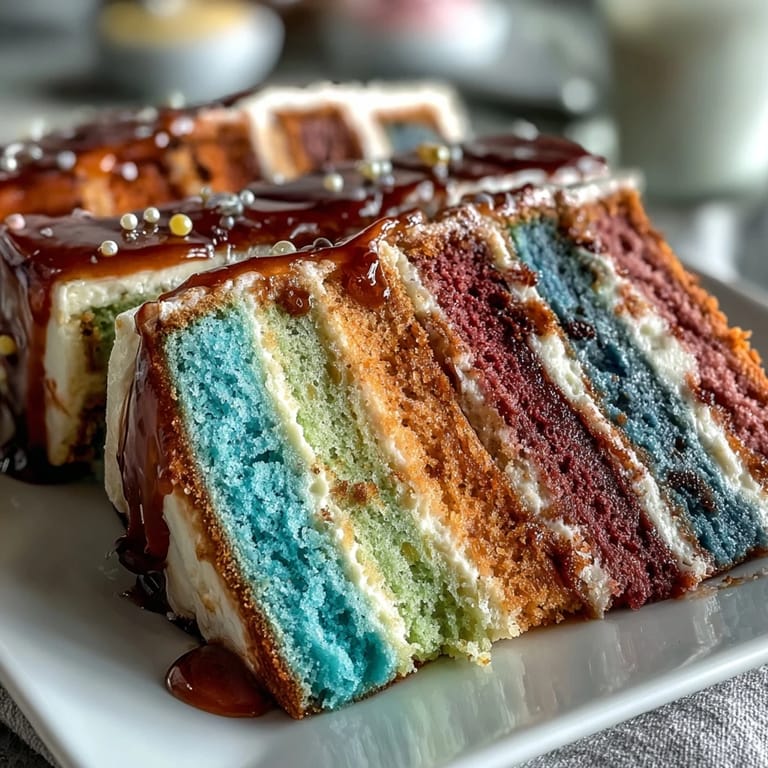
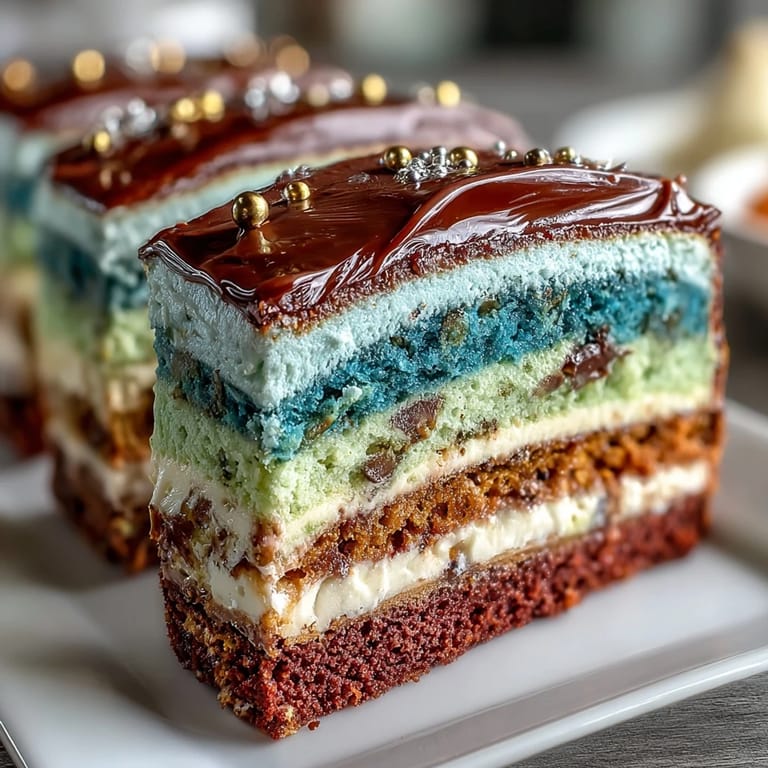
 My friend texted me at midnight asking if I could bake her graduation cake, and instead of panicking, I found myself oddly excited about the challenge. There's something about an ombre cake that feels like edible art, each layer a shade darker or lighter than the last, telling a story without saying a word. I'd watched videos, read forums, and mentally prepared for the buttercream part that everyone warned would either be silky magic or a broken mess. Standing in my kitchen at 6 AM with four cake pans lined up like soldiers, I realized this wasn't just about feeding people at a party—it was about marking a moment worth celebrating with something genuinely beautiful.
I'll never forget the look on my friend's face when she walked into the kitchen and saw those four perfect layers stacked up, the colors graduating from deep school blue to pale sky. Her mom started crying—actually crying—over a cake, which taught me that sometimes the most meaningful gifts aren't complicated, they're just made with intention and a little bit of color.
Ingredients
- All-purpose flour (3 1/4 cups): Measure by spooning and leveling, not scooping straight from the bag, because a packed cup ruins everything.
- Baking powder (2 1/2 tsp): This is your leavening agent and the difference between dense disappointment and cloud-like crumb.
- Salt (1/2 tsp): A small amount that somehow makes the sweetness taste sweeter—don't skip it.
- Unsalted butter (1 cup softened): Room temperature is non-negotiable; cold butter won't cream properly and you'll know within 30 seconds if you messed this up.
- Granulated sugar (2 cups): This creams with the butter to create tiny air pockets that make the cake light.
- Large eggs (4, room temperature): Cold eggs don't emulsify smoothly, and you'll end up with a separated, broken-looking batter that still bakes okay but feels like failure.
- Vanilla extract (1 tbsp): Use real vanilla, not the imitation stuff, because this is a celebration cake and it deserves the real thing.
- Whole milk (1 1/4 cups, room temperature): The dairy keeps the crumb tender and the temperature consistency matters more than you'd think.
- Gel food coloring: Gel is absolutely essential here—liquid food coloring will water down your batter and you'll end up with four cakes that taste like swimming pool.
- Egg whites for buttercream (6 large): Save those yolks for custard or pasta because they're too good to waste.
- Granulated sugar for buttercream (1 1/2 cups): The same sugar as before, but this time it's getting heated and whisked into fluffy clouds.
- Unsalted butter for buttercream (1 1/2 cups softened and cubed): Cut it into chunks first so it incorporates faster once the meringue is ready.
- Vanilla extract for buttercream (2 tsp): Again, the real thing, because this frosting is the star of the show.
Tired of Takeout? 🥡
Get 10 meals you can make faster than delivery arrives. Seriously.
One email. No spam. Unsubscribe anytime.
Instructions
- Set up your stage:
- Preheat your oven to 350°F and grease all four 8-inch round pans with butter, then line the bottoms with parchment circles—this is the only way you get perfect release. Have everything measured and ready before you start mixing because once you begin the creaming process, momentum is your friend.
- Build the dry team:
- Whisk together flour, baking powder, and salt in a medium bowl, breaking up any hidden lumps in the flour because a single lump will bake into a hard pocket of regret. Set this aside and forget about it for a moment.
- Cream the butter and sugar:
- This is the foundation of everything—beat softened butter and sugar together for 3 to 5 minutes until it looks pale, fluffy, and almost mousse-like. You'll know you're done when you lift the beater and the mixture falls in ribbons, and if you taste a tiny bit (yes, raw eggs are a risk, but so is living), it should feel slightly grainy from the sugar, not smooth.
- Introduce the eggs gently:
- Add one egg at a time, mixing well after each addition so the batter stays emulsified and doesn't look broken or separated. If it does separate, don't panic—it'll come back together once you add the flour.
- Add the flavor:
- Mix in vanilla extract and let it disappear into the batter completely.
- Alternate the wet and dry:
- Starting and ending with the flour mixture, alternate adding it with the milk—flour, milk, flour, milk, flour—and mix on low speed until everything just comes together. Overmixing develops gluten and makes the cake tough, so stop as soon as you don't see white streaks anymore.
- Create your ombre moment:
- Divide the batter evenly into four bowls and tint each one with increasing amounts of gel coloring—barely a drop in the first bowl, a few more drops in the second, and so on, until you have a gradient from pale to deep. Stir each one until the color is perfectly even.
- Pour and bake:
- Pour each colored batter into its prepared pan, smooth the tops gently with a spatula, and slide them into the oven. Bake for 22 to 25 minutes until a toothpick inserted in the center comes out clean—a few moist crumbs are okay, but wet batter means more time.
- Cool with patience:
- Let the cakes cool in their pans for 10 minutes so they set enough to release without falling apart, then turn them out onto wire racks to cool completely. This takes at least an hour, and you can't rush it without ending up with melted frosting and frustration.
- Make the meringue:
- Combine egg whites and sugar in a heatproof bowl and set it over a pot of simmering water, whisking constantly until the sugar dissolves and the mixture reaches 160°F—you're basically cooking the eggs safely. It'll feel warm and silky, not hot.
- Whip it into clouds:
- Pour the warm meringue into a stand mixer and whip on high speed for about 10 minutes until stiff peaks form and the mixture is completely cool to the touch. This is where the magic happens—the mixture goes from a warm liquid to a glossy, thick mousse.
- Add the butter gradually:
- With the mixer running, add butter a few cubes at a time, letting each piece fully incorporate before adding the next—this is the moment that either works beautifully or breaks into a greasy mess, and the speed matters more than you'd think. If it looks separated or broken, keep beating; it usually comes back together if you're patient.
- Season the frosting:
- Once all the butter is in and the mixture is thick and fluffy, add vanilla extract and mix until smooth. If you want colored buttercream for accents or ombre effects, divide it now and tint each portion with gel coloring.
- Stack with intention:
- Level your cake layers if they've domed (a serrated knife works beautifully), then place the darkest layer on your cake stand or plate. Spread a thin, even layer of buttercream on top, then add the next layer, repeating until you've stacked all four from darkest to lightest.
- Apply the crumb coat:
- Spread a very thin layer of buttercream over the entire assembled cake—this seals in the crumbs and creates a smooth surface for the final frosting. Chill this for 20 minutes so the buttercream sets.
- Frost with artistry:
- Apply the final, thicker layer of buttercream, smoothing it as you go or leaving it slightly textured if you prefer—this is where your cake becomes a canvas. If you want an ombre effect on the outside, you can swirl different shades together or apply them in sections.
- Decorate and celebrate:
- Top with edible pearls, a graduation topper, or piped details once the frosting is set. Chill the finished cake until serving time, then let it sit at room temperature for about 30 minutes so the frosting softens slightly and tastes its best.
 Pin It
At the graduation party, I watched a little kid ask for a third slice because the cake was "so pretty they wanted to keep looking at it while eating," which is honestly the highest compliment a decorated cake can receive. That's when I understood that this recipe wasn't just about following steps—it was about creating something that mattered to people in the moment.
Color Theory for Your Cake
The ombre effect works best when you start with a pale shade and gradually deepen it, so think about your color story before you start mixing. School colors, seasonal palettes, or even a simple gradient from white to deep navy all look stunning, and the gel coloring gives you precision that liquid coloring simply can't match. The key is using the same amount of batter in each bowl and tinting them progressively—measure by eye or use a scale if you want perfect evenness.
The Swiss Meringue Buttercream Difference
Swiss meringue buttercream tastes silkier and less sweet than American buttercream, which means it won't feel like frosting made of pure sugar—it actually tastes like butter, which is the point. It also holds up better in warm weather because the egg whites are cooked, so you're not serving raw eggs to your guests, and it pipes beautifully for decorative details. The real challenge is patience during the whipping phase; if you rush it or use cold butter, you'll end up with a grainy mess that took half an hour to make.
Timing and Temperature Matter
Baking is a science that requires attention to temperature in ways that cooking doesn't—room temperature ingredients, a properly preheated oven, and cooling time are all part of the formula. I've learned this the hard way by trying to speed things up, and every time I've done it, I've regretted it within the first bite.
- Bring all ingredients to room temperature at least an hour before you start baking, not just the eggs.
- Use an oven thermometer to verify that your oven is actually at 350°F, because many home ovens run hot or cold and will bake your cake unevenly.
- The cake needs to cool completely before frosting, and the frosting needs to set between coats, so build in time and don't rush the process.
 Pin It
 This cake is proof that celebration desserts don't have to be complicated to feel special—they just need intention, a little color, and the knowledge that someone spent time making something beautiful for people they care about. Serve it with sparkling apple cider or champagne, and watch it become the memory of the party.
Recipe Questions & Answers
- → How do I achieve the ombre effect in the layers?
Divide the batter into equal parts and tint each with increasing amounts of gel food coloring to create a smooth gradient from light to dark.
- → What is the best way to make Swiss meringue buttercream?
Whisk egg whites and sugar over simmering water until sugar dissolves, then whip until stiff peaks form before gradually adding softened butter and flavorings.
- → How can I keep cake layers moist and tender?
Alternate adding flour mixture and whole milk, mixing gently until just combined to maintain tenderness in the baked layers.
- → Are there tips for decorating the cake professionally?
After crumb coating and chilling, use piping bags with decorative tips for accents, and finish with edible pearls or themed toppers for a polished look.
- → Can this layer cake be prepared in advance?
Yes, it can be assembled and chilled in advance. Bring it to room temperature before serving for optimal texture and flavor.