 Pin It
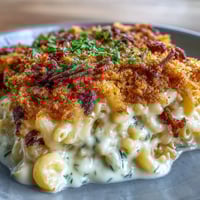
 My neighbor handed me a plate of these golden-brown cups at a block party last summer, and I was skeptical—baked ziti sounded too traditional to get excited about. But the moment I bit through that crispy mozzarella top and found tender pasta layers underneath, I understood why she kept making them. She laughed when I asked for the recipe and admitted she'd invented them one weeknight when her kids insisted on eating pasta with their hands. That one moment of kitchen improvisation turned into something we all now fight over.
The first time I made these for my own family, I panicked halfway through—my muffin tin wasn't sitting flat, and the pasta was sliding around like it didn't want to cooperate. I ended up pressing everything down with the back of a spoon and somehow it worked perfectly. My daughter asked if we could make them every week, which tells you everything about how forgiving and delicious these actually are.
Ingredients
- Ziti or rigatoni pasta (225 g): The tube shape is essential—it holds sauce inside and out, making every bite creamy without getting mushy. Al dente is your friend here since these bake for another 20 minutes.
- Crushed tomatoes (400 g canned): Quality matters more than you'd think; a good crushed tomato tastes like summer in a can, while a cheap one tastes like metal.
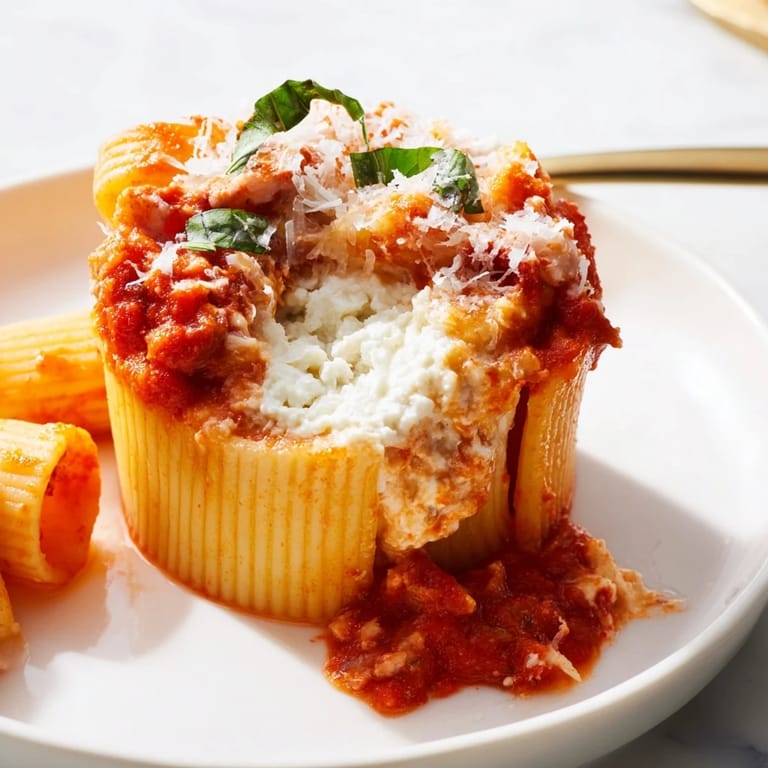
- Ricotta cheese (250 g): This is the secret layer that keeps everything creamy in the middle—don't skip it or substitute it with extra mozzarella.
- Parmesan cheese (60 g grated): Freshly grated is noticeably sharper and more flavorful than the pre-grated stuff, which is worth the thirty seconds it takes.
- Mozzarella cheese (150 g shredded): This forms that crispy, bubbly top everyone reaches for first; low-moisture mozzarella works better than fresh.
- Garlic (2 cloves): Minced fine and sautéed just until fragrant—burnt garlic tastes bitter, so watch this step like a hawk.
- Fresh basil (2 tablespoons optional): If you use it, add it to the ricotta mixture rather than cooking it, so it stays bright and doesn't turn dark.
- Egg (1 large): This binds everything together and helps the ricotta mixture hold its shape as the cups bake.
- Olive oil (1 tablespoon): Just enough to carry the garlic flavor into the sauce without making it greasy.
- Nonstick cooking spray: Non-negotiable—these cups stick more than you'd expect, and this saves frustration.
Tired of Takeout? 🥡
Get 10 meals you can make faster than delivery arrives. Seriously.
One email. No spam. Unsubscribe anytime.
Instructions
- Get your oven ready and prep the tin:
- Preheat to 190°C (375°F) and spray your muffin tin generously—I mean really generously, because pasta has a stubborn memory and wants to stick around. Do this first so everything's ready when you need it.
- Cook the pasta until it's almost done:
- Boil your ziti in salted water until it's just shy of al dente—it'll finish cooking in the oven, so don't let it get too soft. Drain it and let it cool for a minute while you work on the sauce.
- Make the tomato sauce your foundation:
- Heat oil over medium heat, let the garlic bloom until it smells incredible, then add tomatoes and herbs. Let it bubble away for 5 minutes—this short simmer mellows the raw tomato taste without destroying the brightness. Season to taste; this is your chance to get it right.
- Mix the creamy ricotta layer:
- Combine ricotta, Parmesan, egg, basil if using, and salt until it's smooth and spreadable. This mixture is what transforms plain pasta into something luxurious in the middle.
- Toss the pasta with sauce and cheese:
- In a large bowl, combine your cooled pasta with half the sauce and half the mozzarella, stirring gently so nothing breaks. This even coating is what makes the baked cups taste cohesive rather than just-assembled.
- Build each cup with intention:
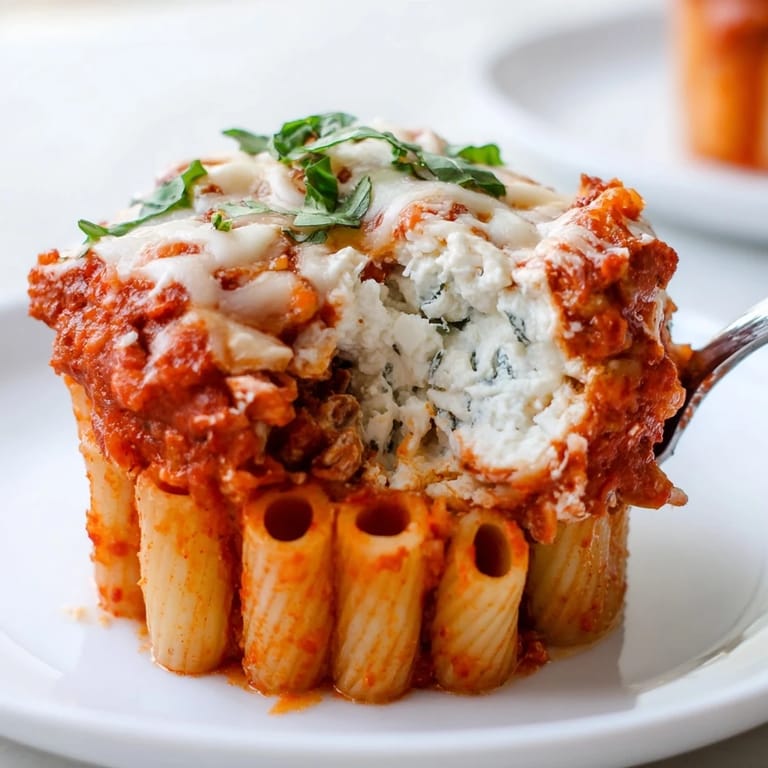
- Divide half the pasta mixture among your muffin cups, pressing it down lightly. Add a spoonful of ricotta to each, then layer the remaining pasta on top. Spoon the rest of the sauce over each cup and finish with the remaining mozzarella—this layering is what creates the textural magic.
- Bake until bubbly and golden:
- Bake for 20–25 minutes, watching until the cheese is melted and the edges are just starting to brown. The top should look inviting, not burnt, and the sauce should bubble at the edges.
- Cool and release them gently:
- Let them rest in the tin for 5 minutes—this matters because they firm up enough to release cleanly. Use a thin knife to loosen around each cup before lifting, and they'll come out as perfect little towers instead of crumbling disasters.
 Pin It
There was a moment at a potluck when someone's four-year-old asked for a third cup, and her parents exchanged this surprised look like they couldn't believe their kid was voluntarily eating layers of cheese and tomatoes. That's when I realized these aren't just clever finger food—they're something that genuinely brings people joy without trying too hard.
Make Them Ahead and Freeze
One of the biggest gifts this recipe gives you is its freezer-friendliness. I've lined muffin tins with these, frozen them solid, then wrapped them individually in foil and stashed them in the freezer for up to three months. On nights when cooking feels impossible, I just pop two cups into the oven while something else is happening, and suddenly there's dinner. This is the kind of advance planning that actually feels like giving your future self a favor, not a chore.
Variations That Work
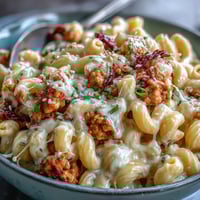
The beauty of these cups is how adaptable they are without losing their identity. You can stir cooked Italian sausage or ground beef into the sauce if you want meatiness, or add a handful of spinach or zucchini to the ricotta layer for vegetables that don't announce themselves. Even switching pasta shapes works—I've used penne and even small shells with great results, though the short tubes do hold filling better than anything too chunky.
What To Serve Alongside
These cups are satisfying on their own, but they shine when you give them partners that provide contrast and brightness. A crisp salad with sharp vinaigrette cuts through the richness beautifully, while garlic bread soaks up any extra sauce and makes the meal feel more complete. Even just a simple green salad with lemon dressing feels like the meal is getting balanced rather than just leaning entirely on cheese and carbs.
- A fresh arugula salad with shaved Parmesan and lemon juice is my favorite pairing because the peppery greens echo the basil in the cups.
- Garlic bread or toasted focaccia gives people something to dunk and makes eating feel less formal and more fun.
- If you're serving these to a crowd, set out hot sauce or red pepper flakes so people can adjust the heat to their taste.
 Pin It
 These cups have become my answer to the question "what should we make?" on nights when I want something impressive but my energy is low. They're proof that the best kitchen ideas often come from just wanting dinner to be less of a mess and more fun to eat.
Recipe Questions & Answers
- → Can I use different pasta shapes for these cups?
Yes, penne or rigatoni work well and hold the layers nicely during baking.
- → How can I make these cups vegetarian?
Simply use vegetarian-friendly cheeses and omit any meat additions in the sauce.
- → What’s the best way to reheat leftover ziti cups?
Reheat in a microwave or oven until warmed through, maintaining the melted cheese texture.
- → Can these be prepared ahead of time?
Yes, assemble and refrigerate before baking, or freeze after baking for later enjoyment.
- → What seasoning complements the tomato sauce?
Dried Italian herbs and garlic enhance the tomato sauce’s savory depth perfectly.