 Pin It
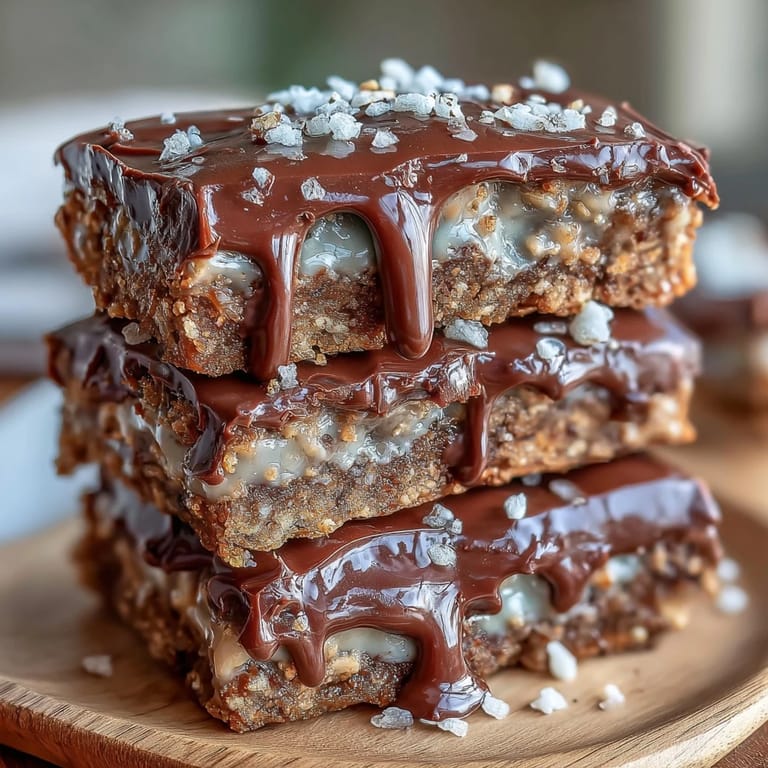
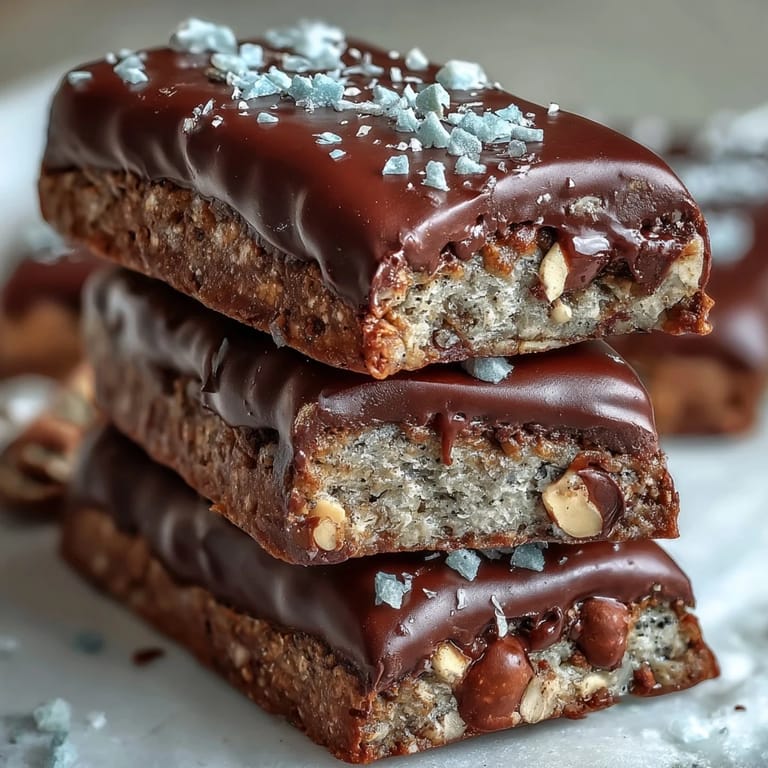
 My kitchen smelled like butter and brown sugar the morning my neighbor stopped by with her kids, all dressed in green for the holiday. She spotted these bars cooling on the rack and asked if they were luck she could steal—turns out, the real luck was having an excuse to bake something this unapologetically festive. These chewy cookie bars became our March tradition after that day, the kind of dessert that tastes like celebration tastes like chocolate, and makes everyone around the table feel a little bit luckier.
I made these for my daughter's school potluck one year, and watching kids fight over the last bar felt like winning something bigger than any recipe ever could. She told me later that her friend asked for the recipe to give to their mom, which somehow made these cookie bars feel like they mattered more than dessert—they felt like something that connected people.
Ingredients
- All-purpose flour (2 1/4 cups): This is your foundation—don't sift it unless your flour is clumpy, just spoon and level it gently.
- Baking soda (1/2 teaspoon): This tiny amount creates that perfect chew and ensures the edges set while the center stays tender.
- Salt (1/2 teaspoon): A pinch that makes the chocolate taste deeper and more like itself.
- Unsalted butter, melted and slightly cooled (1 cup): Let it cool just enough so it doesn't scramble your eggs when you add them, but warm enough to blend smoothly with the sugars.
- Light brown sugar, packed (1 cup): Pack it gently into the measuring cup—the molasses in brown sugar adds chewiness and richness you cannot replicate.
- Granulated sugar (1/2 cup): This balances the brown sugar and helps the edges turn crispy and slightly caramelized.
- Eggs (2 large): Room temperature eggs incorporate more easily and create a better texture throughout.
- Pure vanilla extract (2 teaspoons): The real stuff transforms these from good to memorable.
- Semi-sweet chocolate chips (1 1/2 cups): These are the workhorse of the bar, melting just enough to stay chunky.
- White chocolate chips (1/2 cup): They add sweetness and prettiness, though they can brown quickly so watch them.
- Green sprinkles or sanding sugar (1/4 cup): Mix some into the batter and save some for the top so every bite has that festive crunch.
- Green chocolate candies, optional (1/2 cup): If you use them, your bars taste like celebration looks.
- Clover-shaped sprinkles, optional: These are pure decoration but they make people smile before they even taste anything.
Tired of Takeout? 🥡
Get 10 meals you can make faster than delivery arrives. Seriously.
One email. No spam. Unsubscribe anytime.
Instructions
- Get your oven and pan ready:
- Preheat the oven to 350°F and line your 9x13-inch pan with parchment paper, letting some hang over the edges so you can lift the whole thing out later. This small step saves you from broken corners and frustration.
- Mix your dry ingredients:
- In a medium bowl, whisk together the flour, baking soda, and salt until they look evenly distributed—this ensures your bars rise gently and don't taste salty.
- Combine the wet mixture:
- In a large bowl, whisk the melted butter with both sugars until the mixture is smooth and the brown sugar breaks down into the butter. Add your eggs one at a time, whisking until fully incorporated, then add the vanilla and whisk once more.
- Bring it together carefully:
- Using a spatula, gently fold the dry ingredients into the wet mixture until you just see no flour streaks—overmixing creates tough bars and nobody wants that. Fold is the key word here, not stir.
- Add your chocolate and sprinkles:
- Gently stir in the semi-sweet chocolate chips, white chocolate chips, and about half of the green sprinkles, being careful not to crush them. If you are using green candies, add half of those too.
- Spread into the pan:
- Pour the dough into your prepared pan and spread it evenly using a spatula or the back of a spoon—uneven dough means uneven baking. Top with the remaining green sprinkles, candies, and any clover-shaped sprinkles for the full festive effect.
- Bake to perfection:
- Bake for 23 to 26 minutes, watching for the edges to turn light golden while the center still looks just barely underbaked. A toothpick inserted in the very center should come out with a few moist crumbs clinging to it.
- Cool and cut:
- Let the bars cool completely in the pan—this is when they set and become chewy instead of crumbly. Once cool, use the parchment overhang to lift the whole slab out, then cut into 16 bars with a sharp knife.
 Pin It
There was a year when I brought these to a friend's house and her grandmother, who rarely ate sweets, asked for seconds with a smile that said more than words ever could. Food like this does something quiet and powerful—it makes people feel remembered and celebrated, which might be the whole point of St. Patrick's Day anyway.
The Chew Factor
What makes these bars special is that perfect balance between chew and structure, and that comes from understanding what each ingredient does. The brown sugar brings moisture and molasses depth, the baking soda creates lift and tenderness, and the chocolate stays in distinct chunks rather than melting into one uniform cookie. When you bite into a bar, you should hear a slight crunch from the sprinkles before hitting that soft center—that contrast is what keeps people reaching for a second bar.
Storage and Make-Ahead Magic
These bars are remarkably forgiving because they stay moist and chewy for days when stored properly, making them perfect for baking ahead of any gathering. Stack them between parchment paper in an airtight container at room temperature and they will be just as good on day three as they were on day one, which is not something you can say about every dessert. Freezing them works beautifully too—they thaw quickly and taste like you just pulled them from the oven.
When You Want to Get Fancy
After the bars cool completely, you can drizzle them with melted white chocolate and sprinkle on even more festive toppings for a bakery-style finish that looks like you spent hours on decoration. Some years I add a touch of mint extract to the batter for an unexpected flavor twist, or I swap in dark chocolate chips if I want a less sweet result. The beauty of this recipe is that it can stay simple or become as elaborate as your mood demands.
- Drizzle melted white chocolate over cooled bars and let it set before stacking them, which adds elegance and an extra layer of sweetness.
- Try substituting nuts for some of the chocolate chips if you want texture and richness without more sugar.
- These bars freeze for up to two months, so bake them early in March and you will always have celebration ready in your freezer.
 Pin It
 These bars taste like luck and generosity in the best possible way, and that matters more than any ingredient list could ever capture. Make them, share them, and watch what happens when people realize they are homemade.
Recipe Questions & Answers
- → What gives these bars their chewy texture?
The combination of melted butter, brown sugar, and eggs creates a moist, chewy consistency that holds the bars together well.
- → Can I substitute the green sprinkles with something else?
Yes, you can use sanding sugar in a similar shade or small green candies to maintain the festive look.
- → How do I ensure the bars bake evenly?
Line your pan with parchment paper for easy removal and bake until the edges are lightly golden with a slightly soft center.
- → Is it possible to add nuts to these bars?
Absolutely. Chopped nuts can be folded in with the chocolate chips to add extra texture and flavor.
- → How should I store the bars to keep them fresh?
Store bars in an airtight container at room temperature for several days or freeze for up to two months.