 Pin It
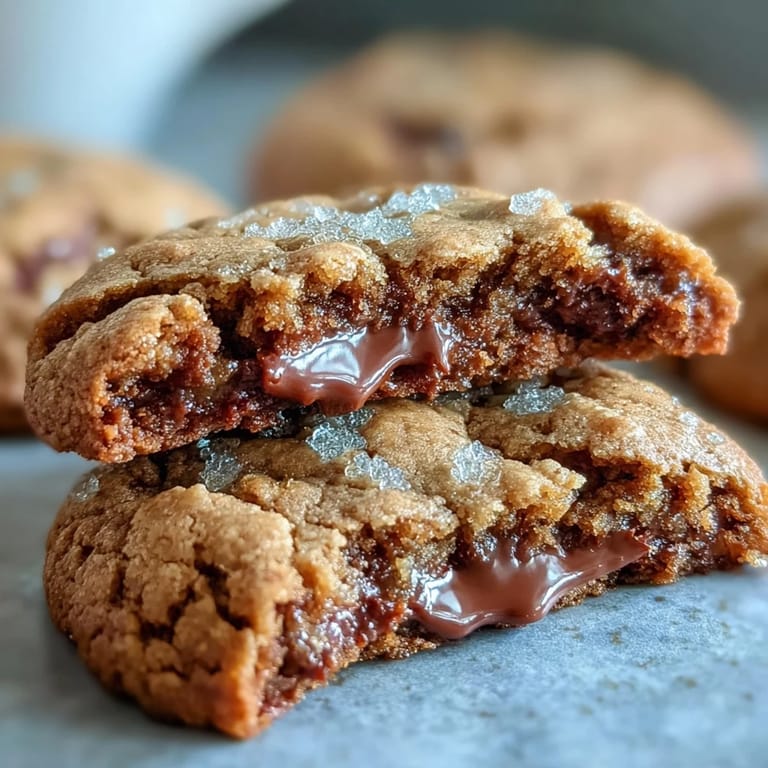
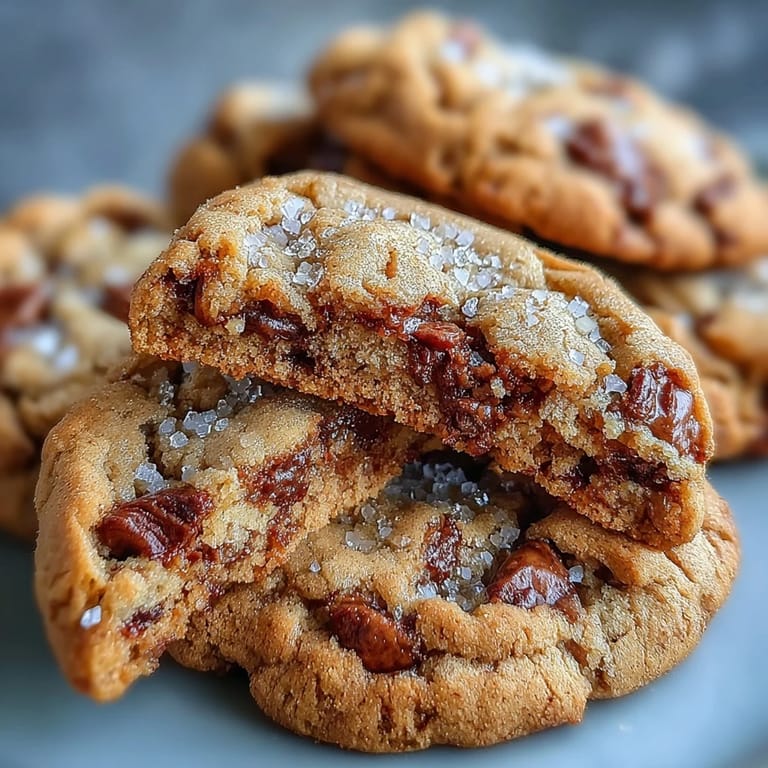
 My first encounter with hojicha was in a small Tokyo café on a rainy afternoon, where the nutty, toasted aroma wrapped around me like a warm blanket. Years later, I found myself standing at my kitchen counter with a stick of butter sizzling in a pan, suddenly wondering what would happen if I married that comforting tea flavor with the deep, caramel notes of brown butter. The result was these cookies—crisp at the edges, impossibly chewy in the middle, and so fragrant they practically announce themselves when they come out of the oven.
I made these for my friend's book club on a November evening, and she told me later that someone asked for the recipe three times before the night ended. There's something about a cookie that smells like toasted grain and caramel that makes people pause mid-conversation—it's the kind of dessert that feels thoughtful without being fussy, which is exactly when cookies do their best work.
Ingredients
- All-purpose flour (2 cups): The foundation here—it needs to be measured by weight if you have a scale, because scooping and leveling can add extra flour that makes cookies dense.
- Hojicha powder (2 tbsp): This is the star ingredient, a roasted green tea that tastes nothing like the grassy matcha you might expect; it's deeper, almost smoky, with caramel undertones that dance with brown butter perfectly.
- Baking soda (1/2 tsp): Just enough to give you that slight lift and chewy texture—don't skip this even though the amount seems tiny.
- Fine sea salt (1/2 tsp): Enhances everything else in the dough; if you only have kosher salt, use a bit less since the crystals are larger.
- Unsalted butter (3/4 cup): This becomes the magic when browned—the milk solids settle to the bottom and toast, creating that nutty backbone the whole cookie rests on.
- Brown sugar (1 cup, packed): Those molasses notes layer beautifully with hojicha; pack it firmly when measuring so you get the full flavor benefit.
- Granulated sugar (1/4 cup): The small amount keeps the cookies from being overly chewy and helps with that crispy edge.
- Egg and egg yolk (1 whole egg plus 1 yolk): The extra yolk adds richness and helps bind everything together into a dough that's forgiving to work with.
- Vanilla extract (2 tsp): A small amount that whispers in the background rather than shouting—it just rounds out the other flavors.
Tired of Takeout? 🥡
Get 10 meals you can make faster than delivery arrives. Seriously.
One email. No spam. Unsubscribe anytime.
Instructions
- Preheat and prepare:
- Heat your oven to 350°F and line two baking sheets with parchment paper—this step matters because cold sheets can spread your cookies unevenly.
- Brown the butter with intention:
- Melt the butter in a small saucepan over medium heat, then keep stirring as it foams. After about 4 to 5 minutes, you'll see the milk solids turn golden and the kitchen will smell like toasted nuts—that's your cue to pull it off the heat and let it cool for 10 minutes so the egg doesn't cook when you mix it in.
- Combine dry ingredients:
- In a medium bowl, whisk together the flour, hojicha powder, baking soda, and salt until everything is evenly distributed so you don't end up with pockets of baking soda.
- Bring wet ingredients together:
- Pour the cooled brown butter into a large bowl, add both sugars, and whisk until smooth and slightly lightened. Then add the whole egg, egg yolk, and vanilla, mixing until you have no streaks of egg white.
- Combine everything:
- Pour the dry mixture into the wet mixture and stir gently until just combined—this is not the time to be aggressive with your spoon, because overmixing develops gluten and makes cookies tough instead of tender.
- Portion the dough:
- Scoop tablespoon-sized mounds onto your prepared sheets, leaving about 2 inches between each one because they will spread and you want them to bake evenly without touching.
- Bake to the sweet spot:
- Bake for 10 to 12 minutes—they should look barely set in the center and golden at the edges, almost under-baked. They will continue cooking as they cool on the sheet.
- Cool with patience:
- Let them sit on the baking sheet for 5 minutes so they firm up enough to move, then transfer to a wire rack to cool completely. This is when you'll hear them crackle a tiny bit as they set.
 Pin It
Last winter, I brought a box of these to my neighbor who had just moved in, and she came over the next day with an empty box and a sheepish smile. She'd eaten them all in one sitting and wanted to know if I'd teach her how to make them—that's when I realized these cookies had crossed from just-good into the territory of life-changing.
The Magic of Brown Butter
Brown butter is one of those kitchen techniques that sounds more complicated than it actually is, and once you understand what's happening, you'll start using it in everything. When you heat butter past melting, the water content evaporates and the milk solids drop to the bottom of the pan where they toast and develop deep, nutty flavors that no regular melted butter can match. The caramel notes from brown butter are what make hojicha sing in these cookies—they're not competing flavors, they're having a conversation.
Understanding Hojicha
Hojicha is green tea that's been roasted at high temperatures, which transforms it completely from grassy and vegetal into something warm, toasted, and almost caramel-like. If you can't find hojicha powder, you can substitute matcha for a more herbaceous flavor, but honestly, the hojicha is worth tracking down online or asking for at a Japanese grocery store—it's becoming easier to find everywhere. Once you have a tin of it, you'll find yourself adding it to brownies, lattes, ice cream, and anywhere else you want a sophisticated depth without heavy flavors.
Storage, Substitutions, and the Small Details
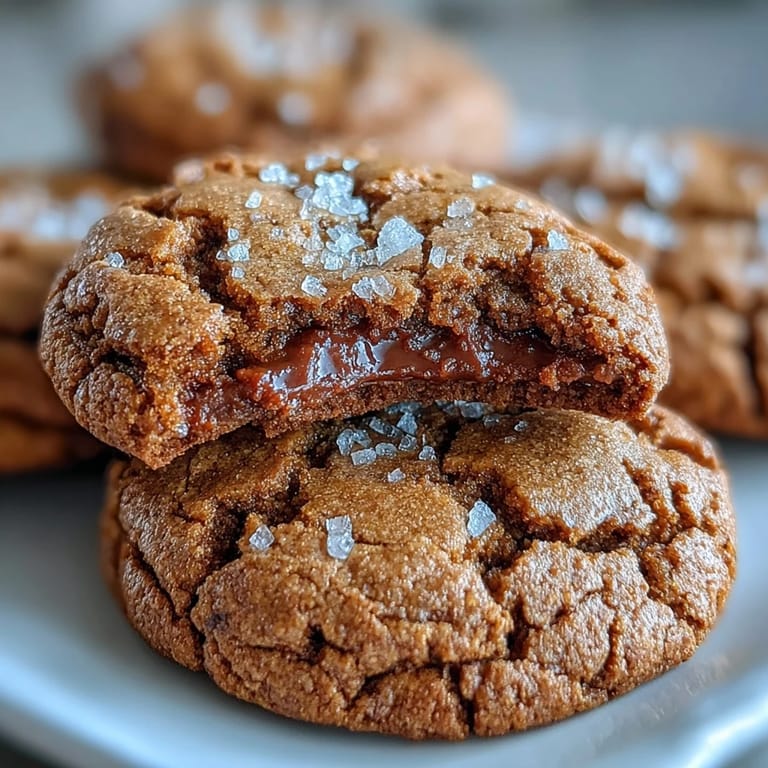
These cookies keep beautifully in an airtight container for up to five days, and they even freeze well for up to a month if you want to make a double batch and save some for moment when you need them most. If hojicha truly isn't accessible to you, matcha will work, though the flavor will be brighter and more grassy rather than toasted—add just a tiny pinch of flaky sea salt to the dough if you go this route to bring depth back. One small trick I learned is sprinkling a pinch of flaky sea salt on the cookies the moment they come out of the oven, while they're still warm—it adds a sophisticated contrast that makes people ask what your secret ingredient is.
- If your brown butter separates or looks grainy, you've cooked it too far and should start again with a fresh stick.
- Room temperature eggs mix more smoothly into the sugar and butter, so take them out of the fridge while you're browning the butter.
- These cookies pair beautifully with hojicha tea itself, or with cold milk if you want something less formal and more nostalgic.
 Pin It
 There's something deeply satisfying about a cookie that tastes like it came from a fancy patisserie but actually came from your own kitchen on a regular Tuesday. These hojicha and brown butter cookies are that recipe—the one that shows people you care without requiring you to be a professional baker.
Recipe Questions & Answers
- → What makes hojicha different from matcha?
Hojicha is roasted green tea, giving it a deep reddish-brown color and distinct caramel, nutty notes. Matcha is shade-grown and steamed, resulting in a vibrant green color and grassy, vegetal flavor. The roasting process reduces hojicha's caffeine content while creating a more mellow, toasty profile.
- → Why brown the butter for these cookies?
Browning butter transforms its flavor by caramelizing the milk solids, creating nutty, toasty notes that perfectly complement hojicha's roasted character. This extra step adds depth and richness you can't achieve with melted or softened butter alone.
- → Can I substitute hojicha powder?
Matcha powder works as a substitute, though it will create green cookies with a more vegetal flavor. You could also use roasted black tea powder or leave out the tea entirely for classic brown butter cookies. Keep in mind the flavor profile will change significantly.
- → How do I know when the cookies are done?
The cookies are ready when edges are golden brown and centers appear slightly underbaked or soft. They'll continue cooking on the hot baking sheet during the 5-minute cooling period. This method ensures the desired crispy edge and chewy center texture.
- → Why must the browned butter cool before mixing?
Hot butter would cook the eggs when added, creating scrambled bits and affecting the cookie's texture. Cooling for 10 minutes brings the temperature down while keeping the butter liquid enough to incorporate smoothly with the sugars.
- → Can I chill the dough before baking?
Yes, chilling for 30 minutes to overnight enhances flavor development and prevents excessive spreading. If chilling longer than an hour, let the dough sit at room temperature for 15-20 minutes before scooping to prevent cracking.